APM with Microsoft .NET Core on Azure
- 3 minutes read - 569 wordsOne of the things I am very interested in is the .NET stack and especially the .NET Core platform. In this blog post I want to briefly highlight what it takes to get a sample .NET Core application up and running on Azure and how to use New Relic’s Application Performance Monitoring (APM) to monitor this application.
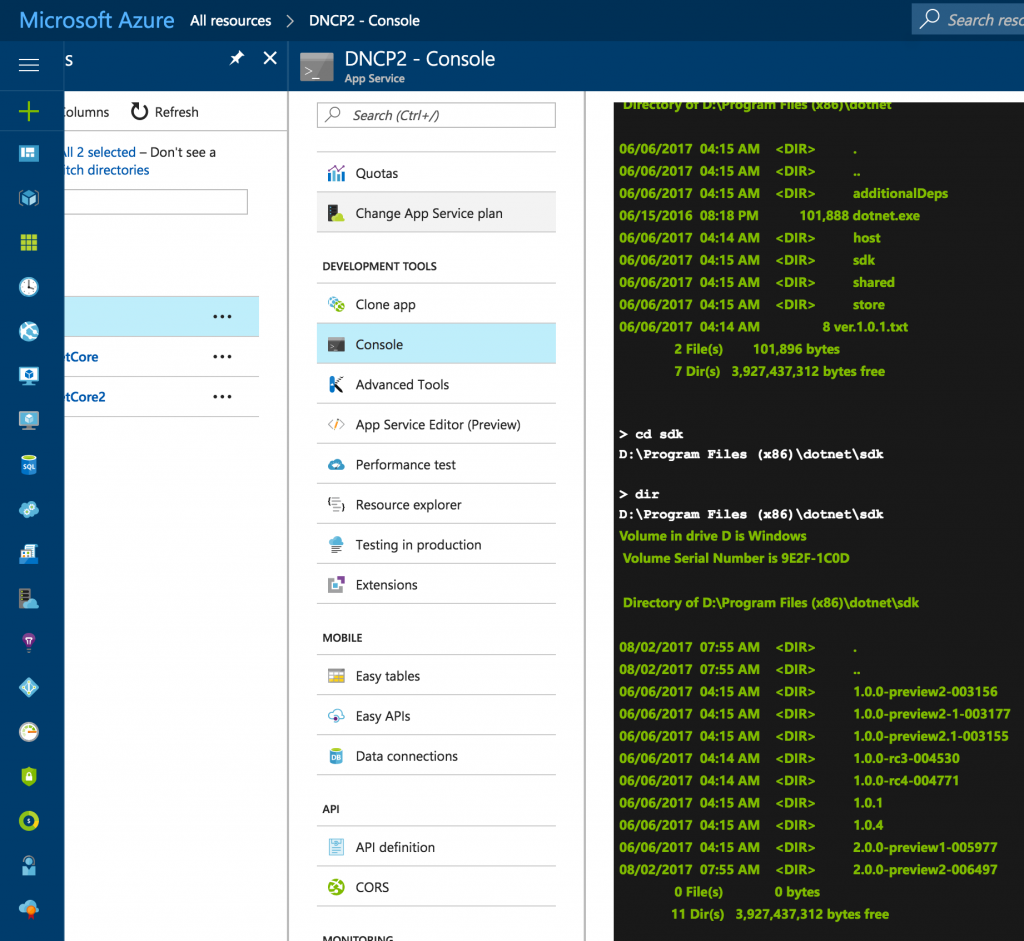
Please note: while I am writing this, the latest version of .NET Core SDK is .NET Core 2.0 Preview 2; dependent upon how you get the SDK, there is already a preview 3 of the .NET Core CLI out there, but this is currently not supported on Azure. You can check for support by using a Developer Console (Developer Tools –> Console of an Azure App Service) within the Azure portal and navigate to D:\Program Files (x86)\dotnet\sdk.

In general, you can follow this blog post by Scott Hanselman to get started and have a sample app available on your local machine.After you have done this and maybe tested it locally, there is really just as few additional steps to get this app deployed in Azure and monitored in NR.
1. Update a setting in your project file (*.csproj)
2. Add a NuGet.Config file to the root of your project
So now that we have prepared our .NET Core sample app, the question is “how do we get the app uploaded and deployed to Azure?”.
- First of all, you need to have an Azure account. If you don’t already have one, sign-up for one here.
- Create a new Azure App Service by
- Clicking on the “+"-sign in the Azure portal
- Select “Web + Mobile”
- Select “Web App”
- Enter the default data that is requested and be sure to keep “Windows” as the OS type
- Click on “Create” to let it create the environment. We can leave this for now and continue on our local machine.
- Deploy the app: the easiest way to achieve this is through setting up a local GIT repository and use that to deploy to an Azure app service. There is a great article on the Azure documentation that explains this in detail. Basically, these are the commands to achieve this:
- git init
- git add -A
- git commit -m “Hello Azure App Service”
- git remote add azure (pls. refer to the Azure documentation link above for the GIT URL)
- git push azure master
- Once successfully deployed, you should go back to your app in Azure portal by selecting the “All resources” window as an Azure App Service.
- Click on the app name that you have created earlier.
- Select the “Properties” from the menu options
- Scroll down to the “App settings” section and enter the necessary environment variables for the agent.
- CORECLR_ENABLE_PROFILING=1
- CORECLR_PROFILER={36032161-FFC0-4B61-B559-F6C5D41BAE5A}
- CORECLR_PROFILER_PATH=D:\Home\site**\wwwroot\wwwroot**\newrelic\NewRelic.Profiler.dll
- CORECLR_NEWRELIC_HOME=D:\Home\site**\wwwroot\wwwroot**\newrelic
- Also in the “App settings”, there is an option to choose the “Platform” for this app. This should be set to 64-bit. Please note: this option is only available if the underlying App Service Plan (the pricing tier for your app) is scaled-up to at least a “B1 Basic” tier. The free option (F1) does not allow you to specify this.
- Once you saved these settings, you should stop the app and start it again within the Azure portal (click the “Overview” link and see buttons in the top section), you should see the app being monitored in NR.
Let me know your thoughts and please get in touch with me if you have any questions.