Using .NET Aspire eShop application to collect all the telemetry
- 6 minutes read - 1168 wordsLearn how to collect all the telemetry from the .NET Aspire eShop application and send it to an OpenTelemetry backend such as New Relic
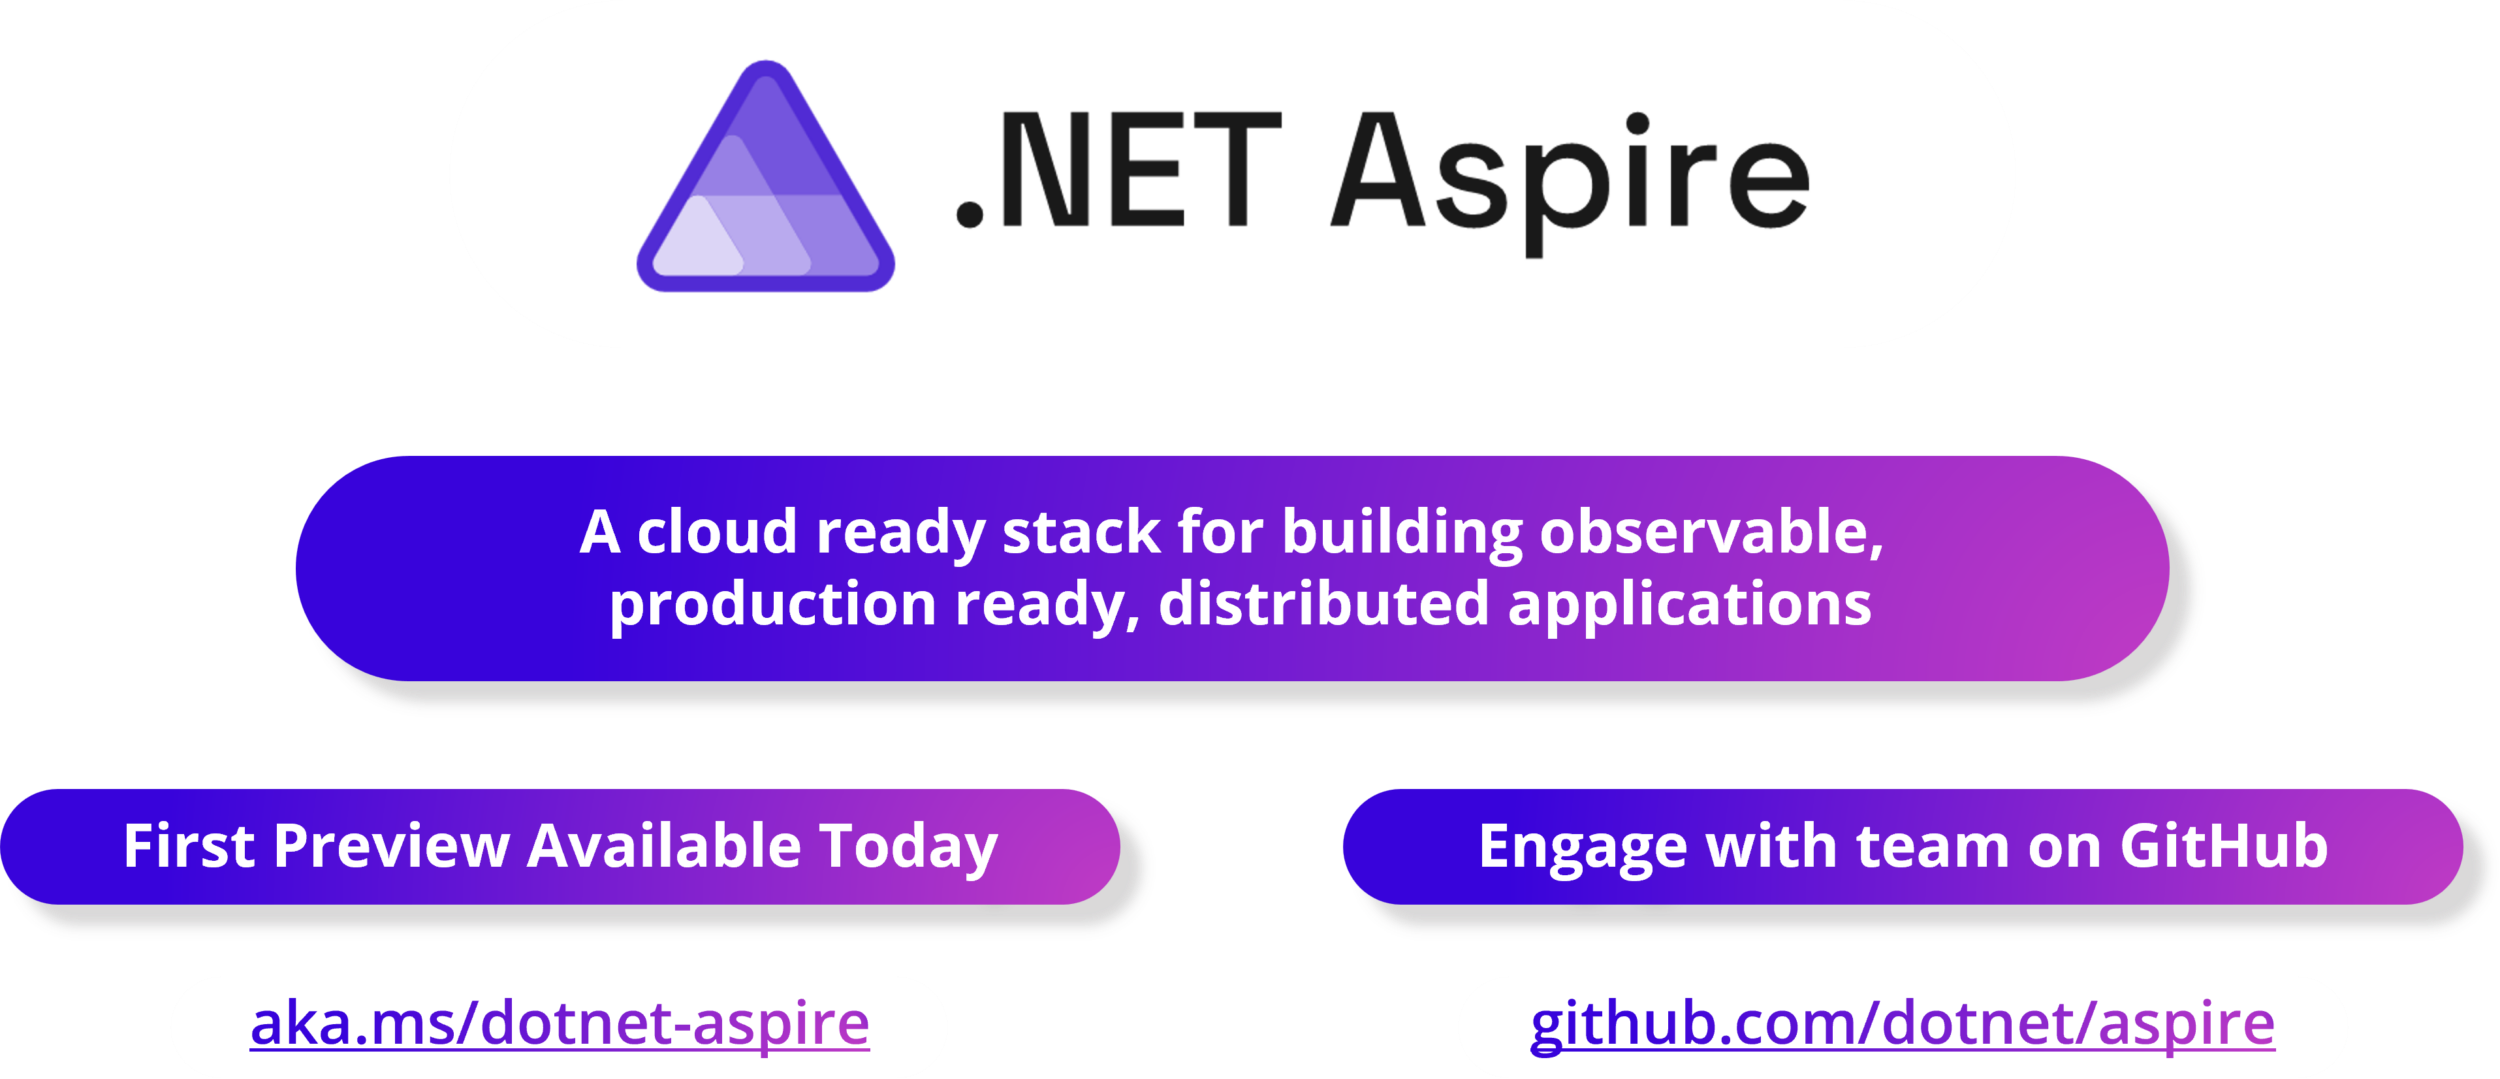
.NET Aspire is the new kid on the block when it comes to an opinionated, cloud-ready stack for building observable, production-ready, distributed applications. Having a built-in dashboard for the monitoring data is nice during development. But how do you configure OpenTelemetry correctly to send it to an observability backend? This is what this blog post is all about. And you’ll also learn how to send custom attributes by leveraging OpenTelemetry SDKs.
.NET Aspire
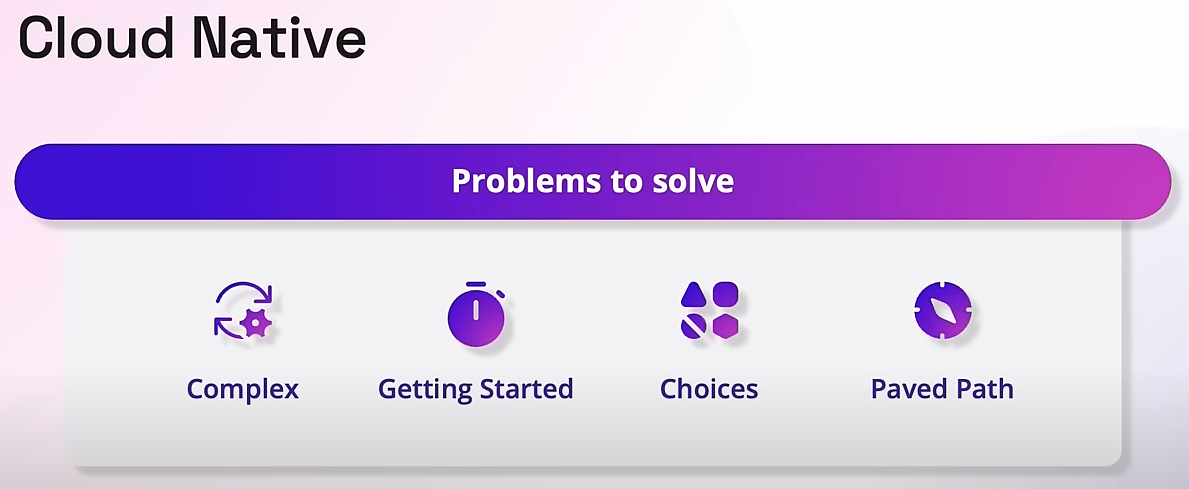
.NET Aspire was first announced and introduced at .NET Conf 2023 Keynote. The challenges it tries to solve are:
- Complex: Cloud computing is fundamentally hard.
- Getting started: For new developers in this space, a first step into cloud native can be overwhelming.
- Choices: Developers need to make a lot of choices.
- Paved path: .NET did not have a golden paved path available for developers to build cloud-native applications.
This is exactly where .NET Aspire comes into play. It includes the following features as part of the stack:
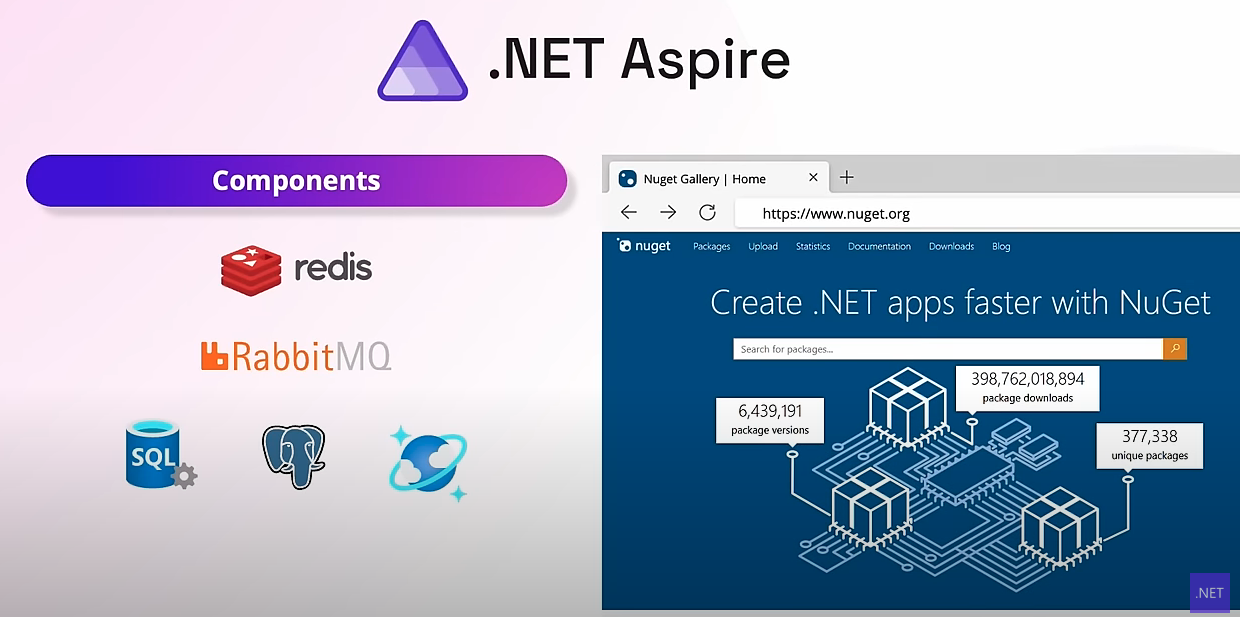 Components: Curated suite of NuGet packages specifically selected to facilitate the integration of cloud-native applications with prominent services and platforms, including but not limited to Redis and PostgreSQL. Each component furnishes essential cloud-native functionalities through either automatic provisioning or standardized configuration patterns.
 Developer Dashboard: Allows you to track closely various aspects of your application, including logs, traces, and environment configurations, all in real time. It’s purpose-built to enhance the local development experience, providing an insightful overview of your app’s state and structure.
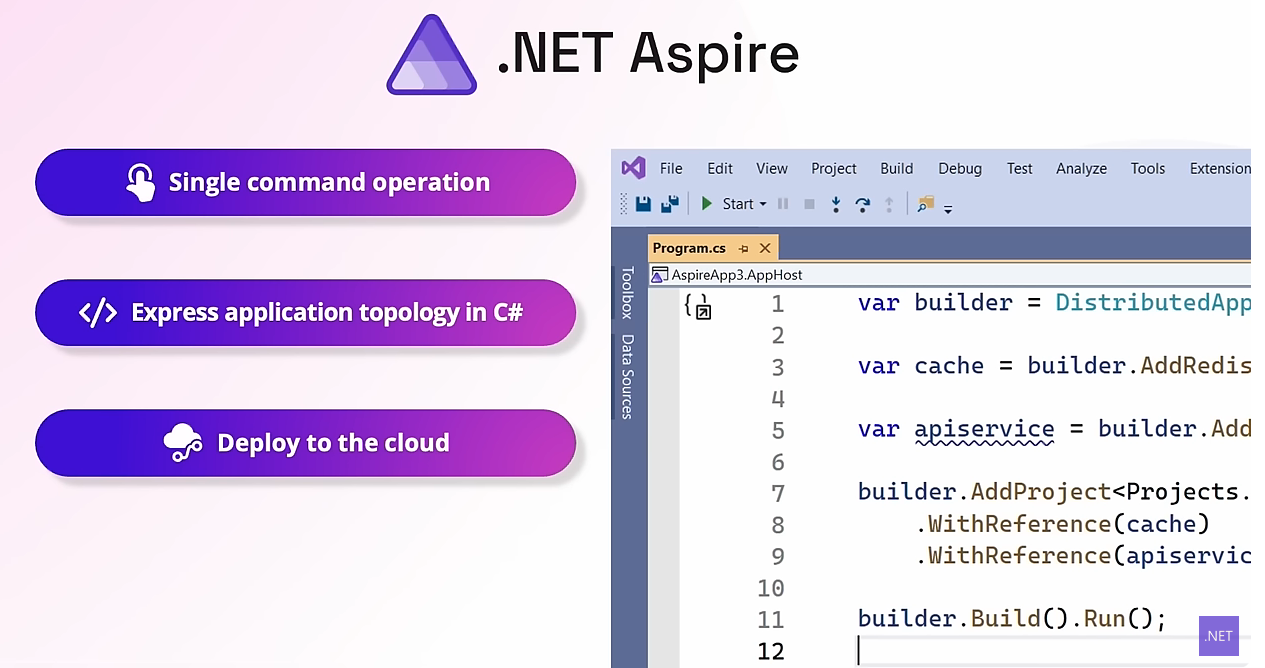 Tooling/Orchestration: .NET Aspire includes project templates and tooling experiences for Visual Studio and the dotnet command-line interface (CLI) help you create and interact with .NET Aspire apps. It also provides features for running and connecting multi-project applications and their dependencies.
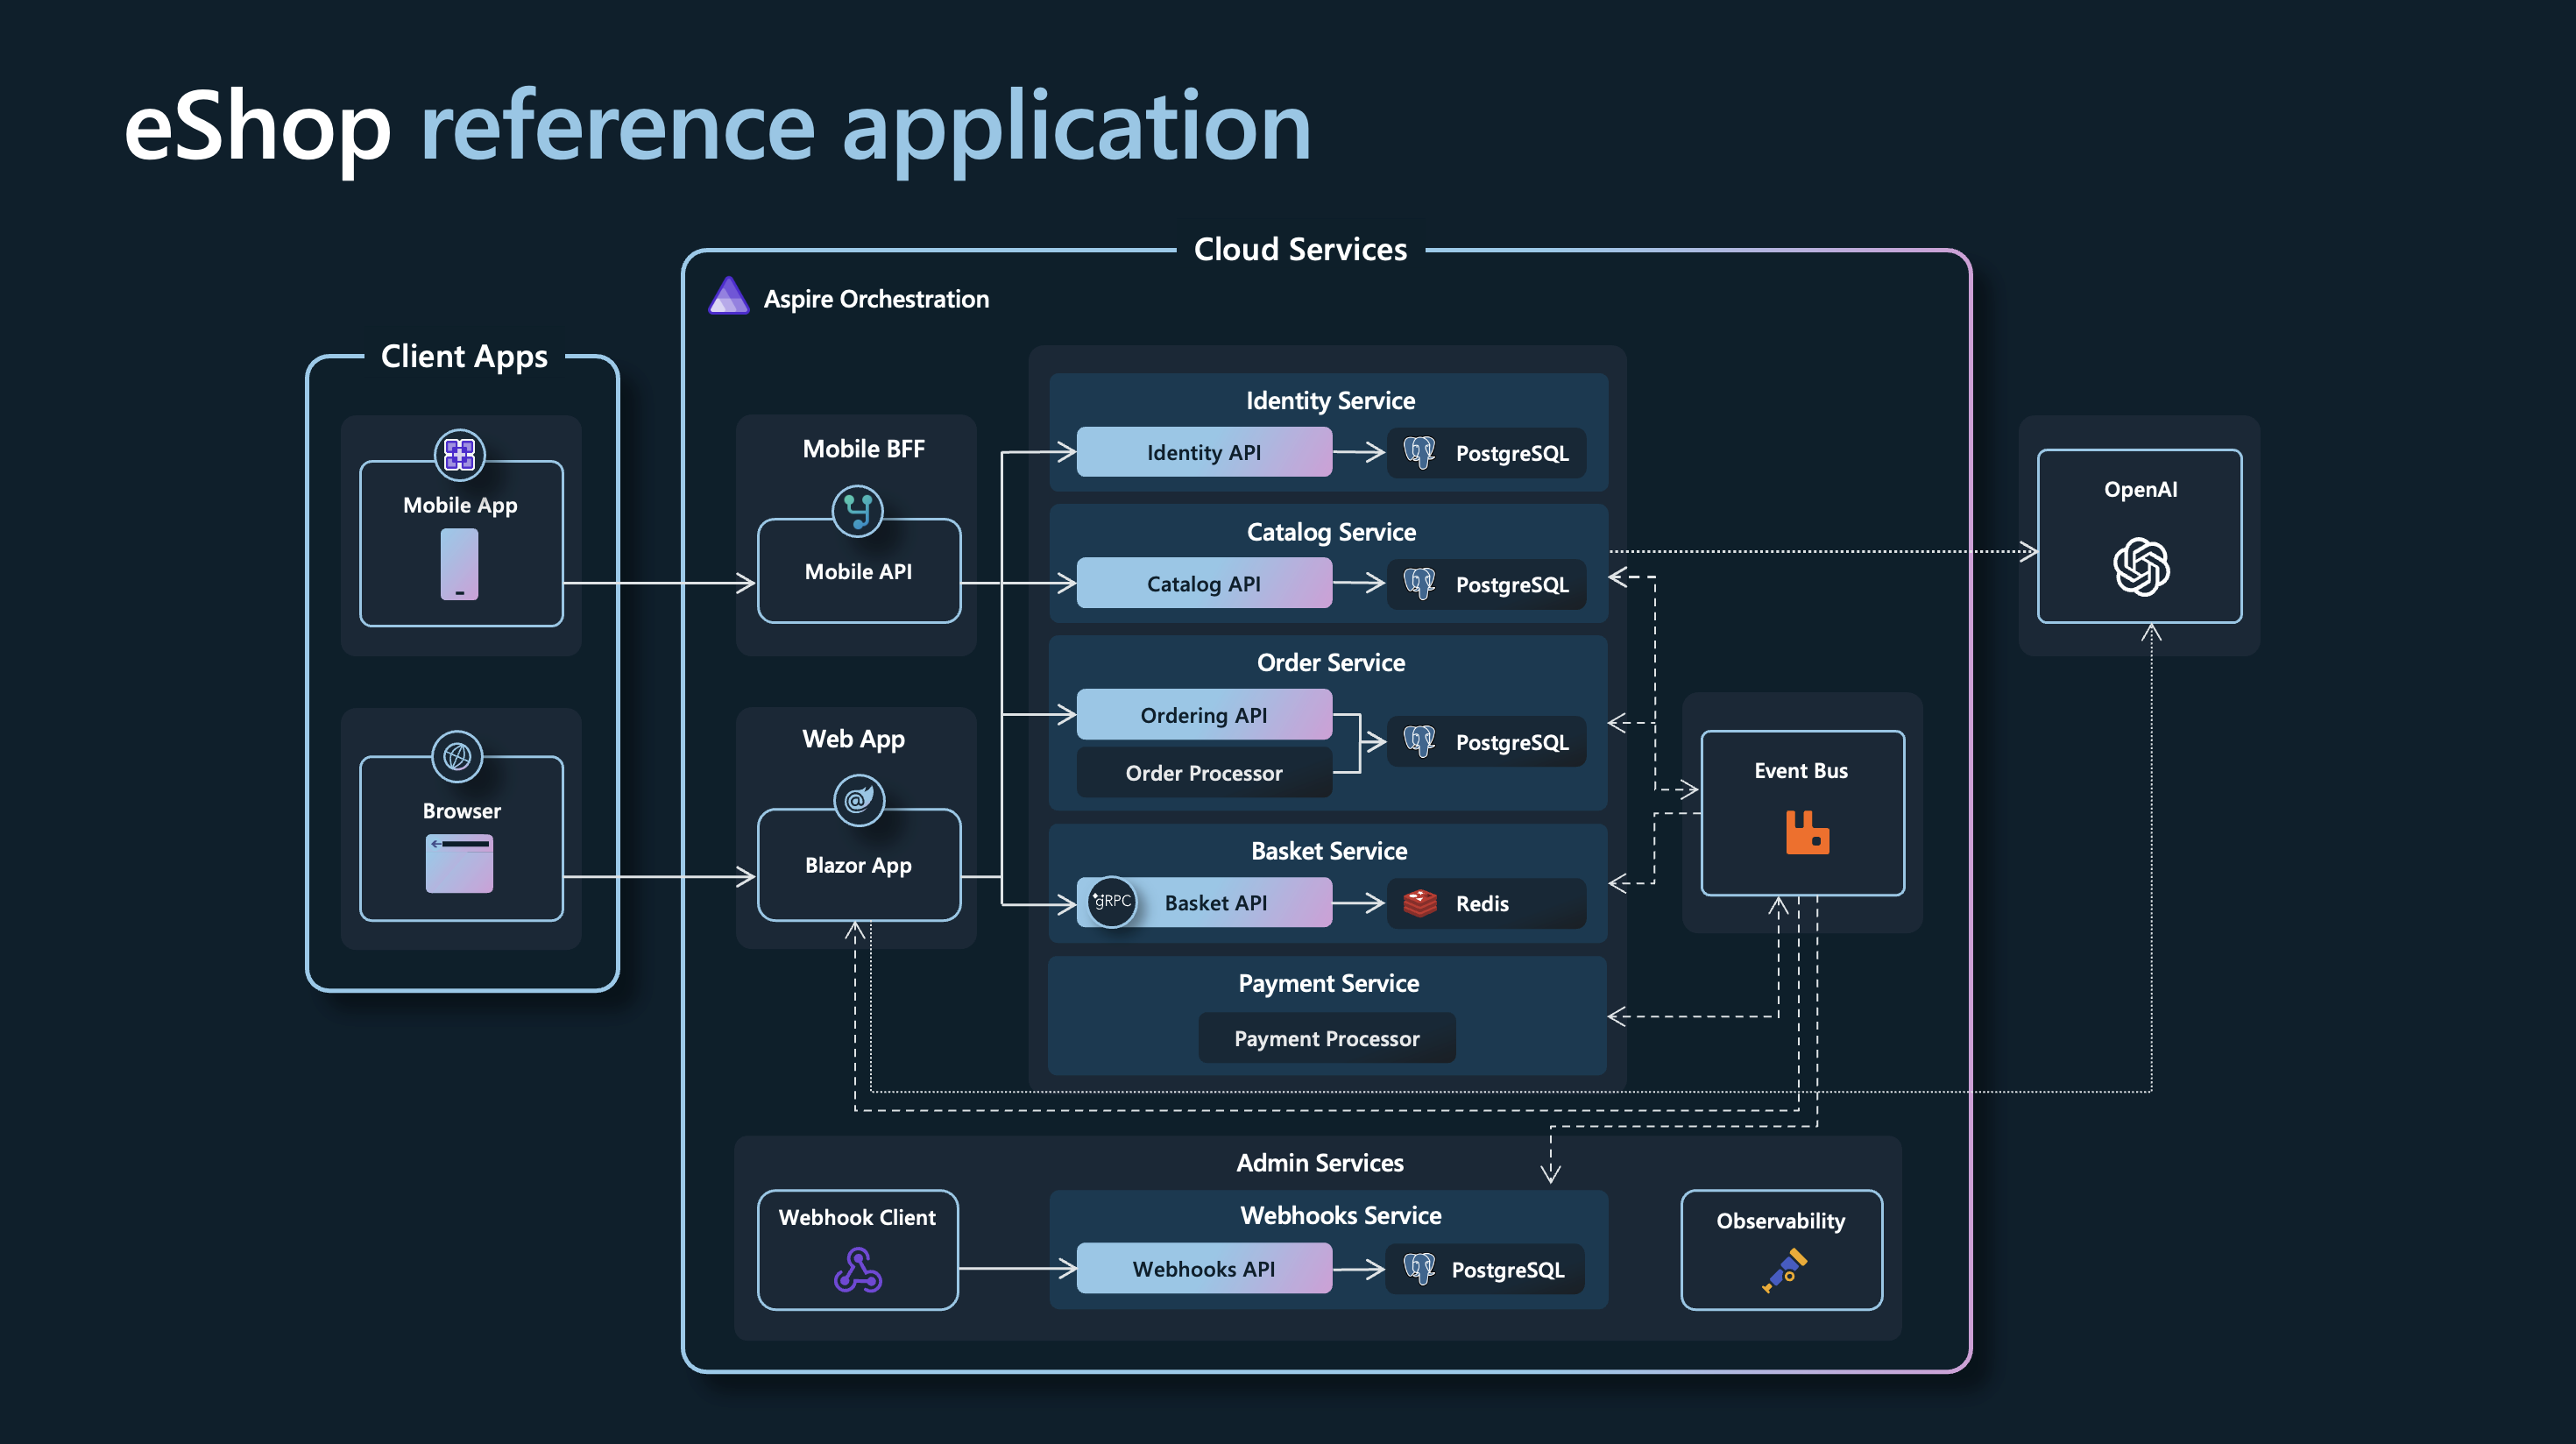
eShop demo application
A reference .NET application implementing an ecommerce website using a services-based architecture.
In the latest version of the application, the source code is already updated to include .NET Aspire as part of the project. You can install the latest .NET 8 SDK and clone the repository. Additionally, you can run the following commands to install the Aspire workload:
dotnet workload update
dotnet workload install aspire
dotnet restore eShop.Web.slnf
Once you have all the other prerequisites ready on your machine, you can run the application from your terminal with the following command:
dotnet run --project src/eShop.AppHost/eShop.AppHost.csproj
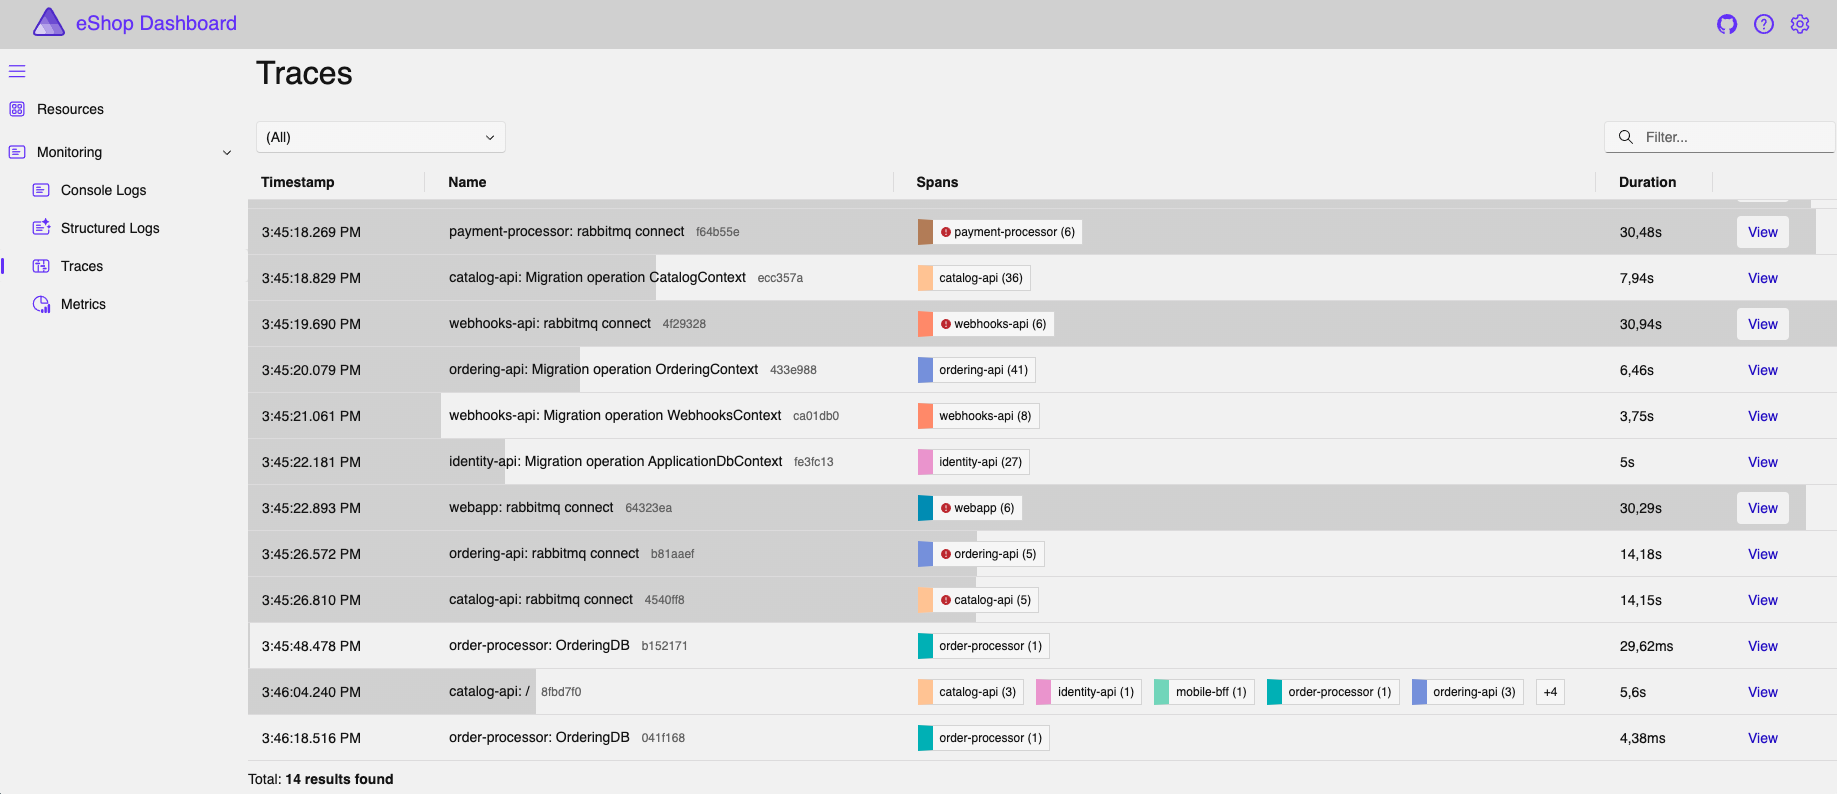
.NET Aspire developer dashboard
Once the application is up and running, go to the developer dashboard to identify the various resources that are part of the eShop application, including the endpoints and URL(s) to reach the running resources directly.
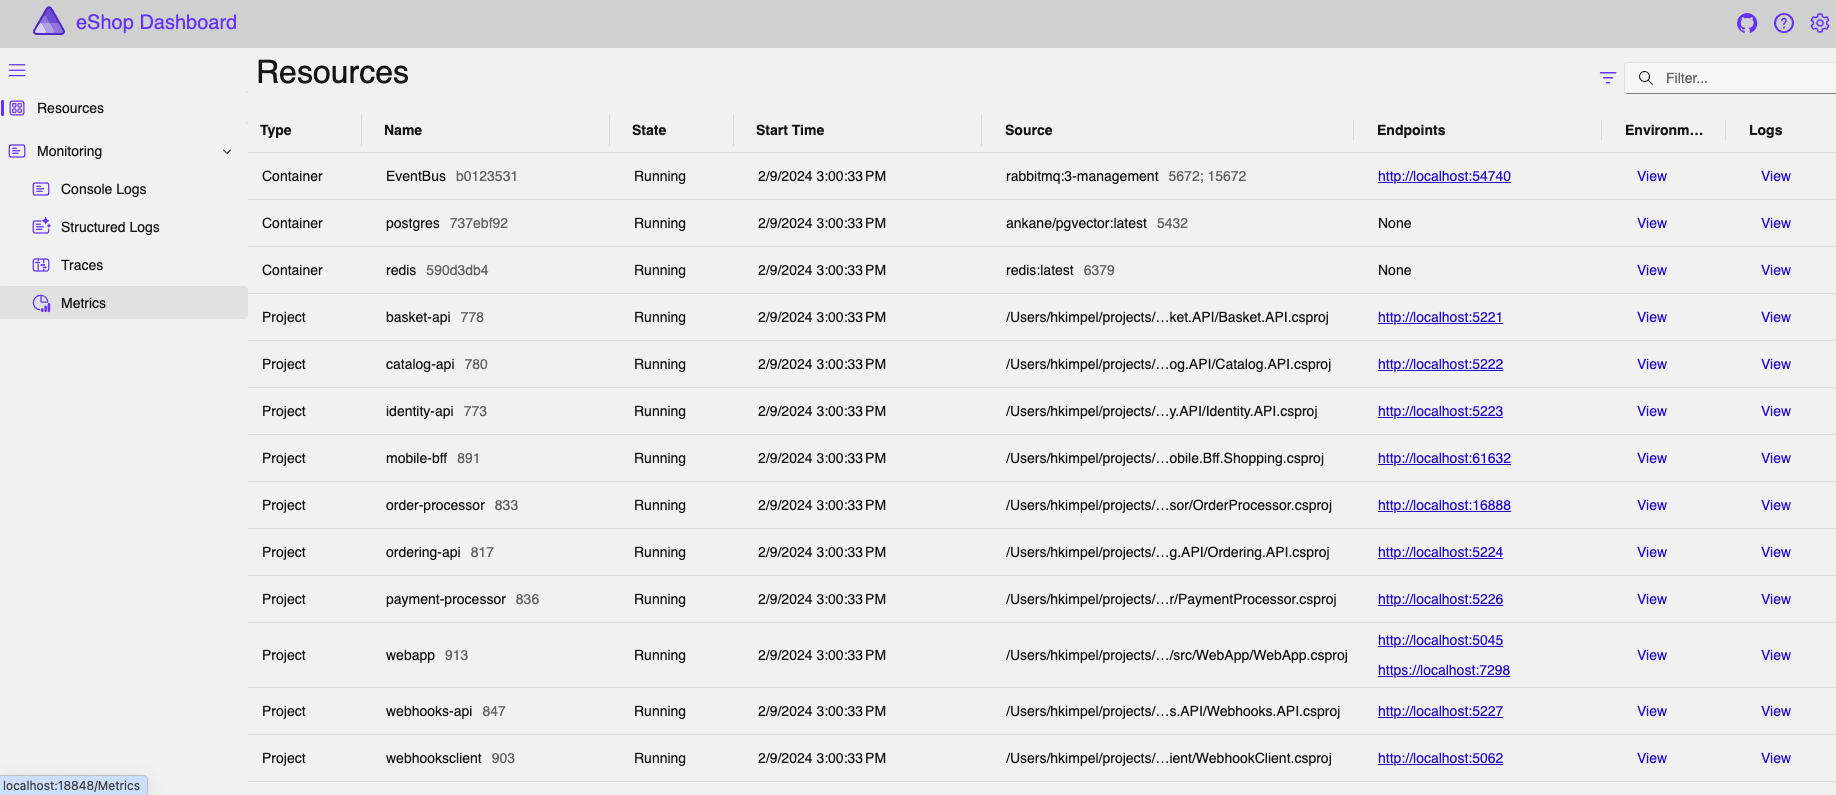
This dashboard also includes monitoring telemetry, including logs, traces, and metrics.
.NET Aspire orchestration
.NET Aspire provides APIs for expressing resources and dependencies within your distributed application.
Before continuing, consider some common terminology used in .NET Aspire:
- App model: A collection of resources that make up your distributed application (DistributedApplication). For a more formal definition, see Define the app model.
- App host/Orchestrator project: The .NET project that orchestrates the app model, named with the *.AppHost suffix (by convention).
- Resource: A resource represents a part of an application whether it be a .NET project, container, or executable, or some other resource like a database, cache, or cloud service (such as a storage service).
- Reference: A reference defines a connection between resources, expressed as a dependency. For more information, see Reference resources.
.NET Aspire empowers you to seamlessly build, provision, deploy, configure, test, run, and observe your cloud application. This is achieved through the utilization of an app model that outlines the resources in your app and their relationships.
Sending telemetry to an OpenTelemetry backend such as New Relic
Having a built-in dashboard for the monitoring data is nice during development. In this section I focus on how to configure OpenTelemetry correctly to send all telemetry into New Relic as my observability backend of choice.
For the scenario described in this article, I created my own fork of the official eShop application. Within this repository, you’ll be able to find the app host project that contains its main component.
Lines 17 through 26 define some basic configuration variables that you can provide using environment variables in your terminal.
- NEW_RELIC_LICENSE_KEY: New Relic license key for the OpenTelemetry protocol (OTLP) API header value
- NEW_RELIC_REGION: US or EU region configuration for your New Relic account
Based on the New Relic region configuration, the code will define the New Relic OTLP endpoint for OpenTelemetry and use it in the OTEL_EXPORTER_OTLP_ENDPOINT variable.
The rest of the app host project is already prepared to add an environment configuration for each of the projects that are part of the Aspire application. For example, here’s the configuration for the Identity.API project:
...
// Services
var identityApi = builder.AddProject<Projects.Identity_API>("identity-api")
    .WithReference(identityDb)
    .WithEnvironment("OTEL_EXPORTER_OTLP_ENDPOINT", OTEL_EXPORTER_OTLP_ENDPOINT)
    .WithEnvironment("OTEL_EXPORTER_OTLP_HEADERS", OTEL_EXPORTER_OTLP_HEADERS)
    .WithEnvironment("OTEL_SERVICE_NAME", "identity-api");
...
In this fork of the eShop application I’ve added some additional environment configuration. Each of the .WithEnvironment statements adds a necessary environment variable for the service:
- OTEL_EXPORTER_OTLP_ENDPOINT: The OTLP endpoint for all the telemetry for this service; in our case, the New Relic OTLP endpoint.
- OTEL_EXPORTER_OTLP_HEADERS: The API header value, which includes our New Relic license key (
string OTEL_EXPORTER_OTLP_HEADERS = "api-key=" + NEW_RELIC_LICENSE_KEY;). - OTEL_SERVICE_NAME: The name of the service relevant to create a respective entity in New Relic.
The rest of the services are configured appropriately.
Once you’ve configured the environment variables in your terminal (that is, NEW_RELIC_LICENSE_KEY and NEW_RELIC_REGION), you can start the Aspire application with the following command:
dotnet run --project src/eShop.AppHost/eShop.AppHost.csproj
You can confirm whether everything is configured correctly by looking at the environment and clicking on the view icon for one of the projects:
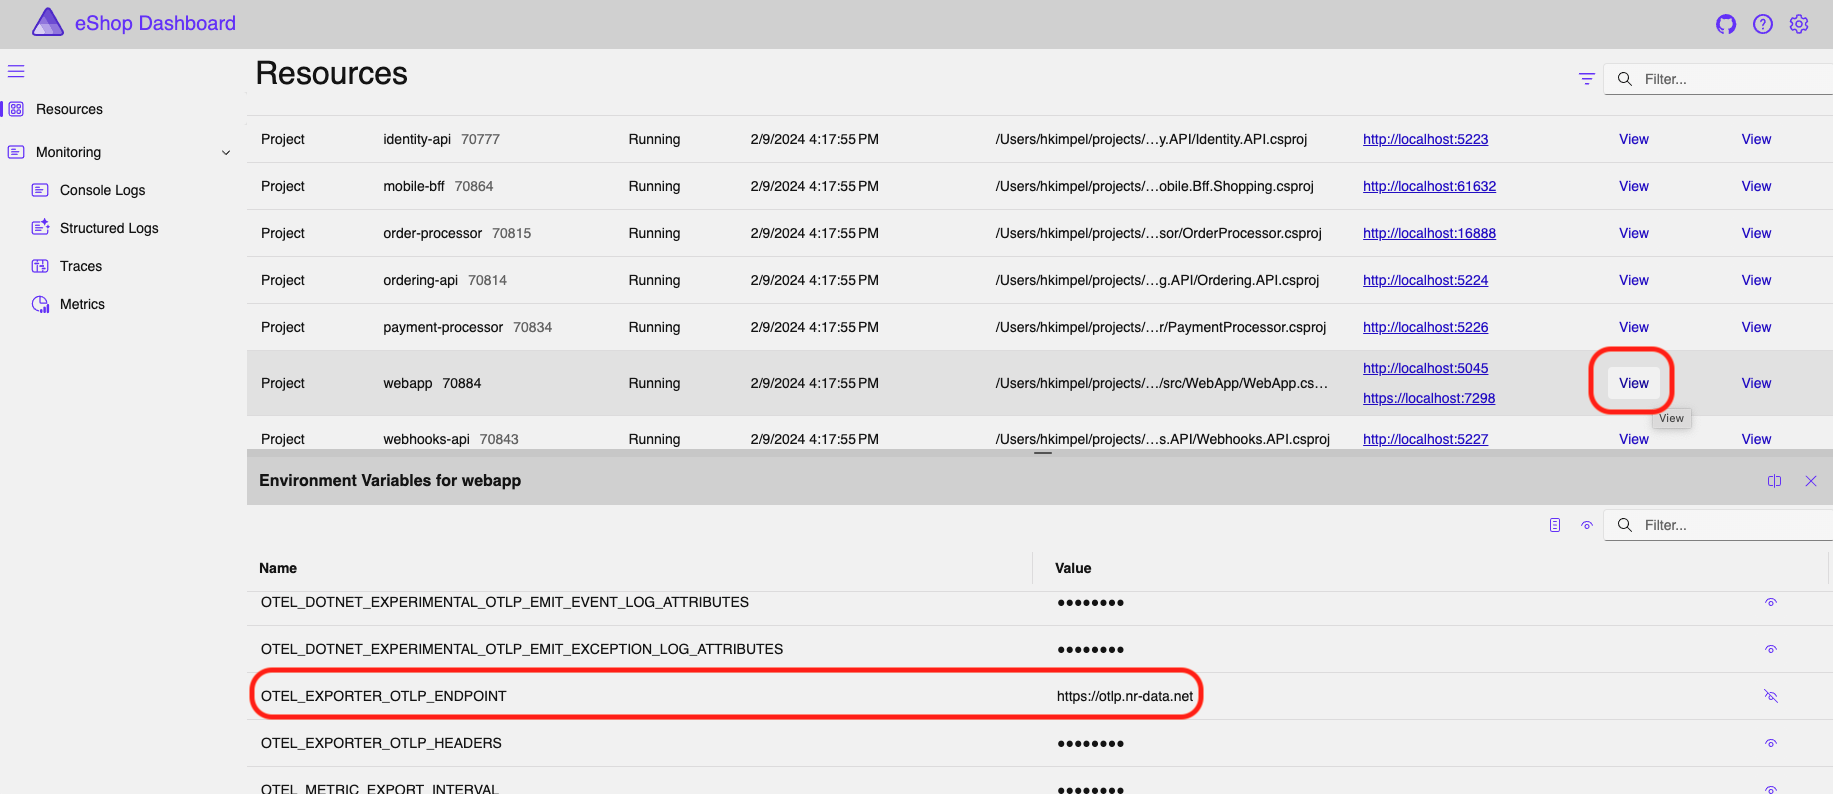
The OTEL_EXPORTER_OTLP_ENDPOINT should point to the New Relic OTLP endpoint.
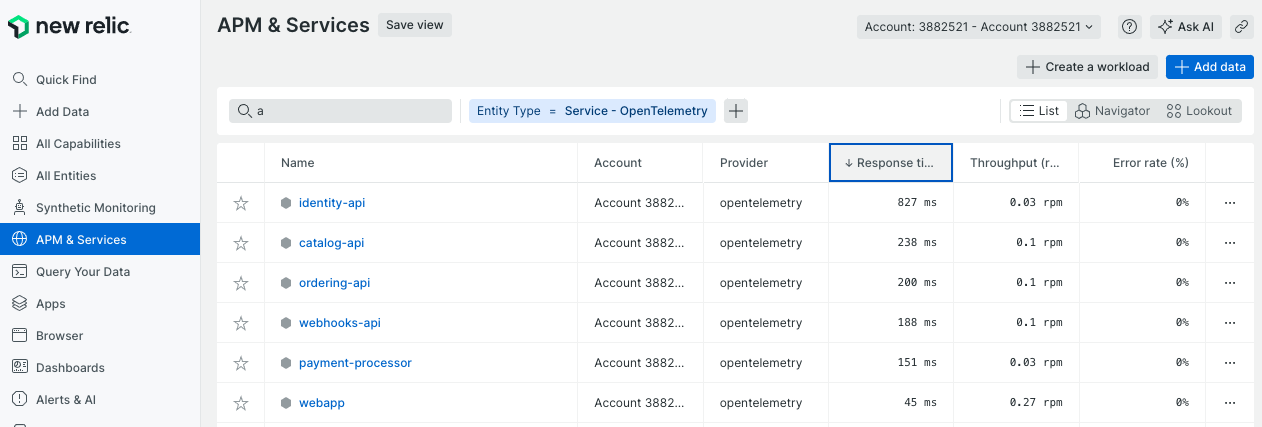
After a little while, you should be able to see data from your application visible in the APM & Services - OpenTelemetry section of New Relic:
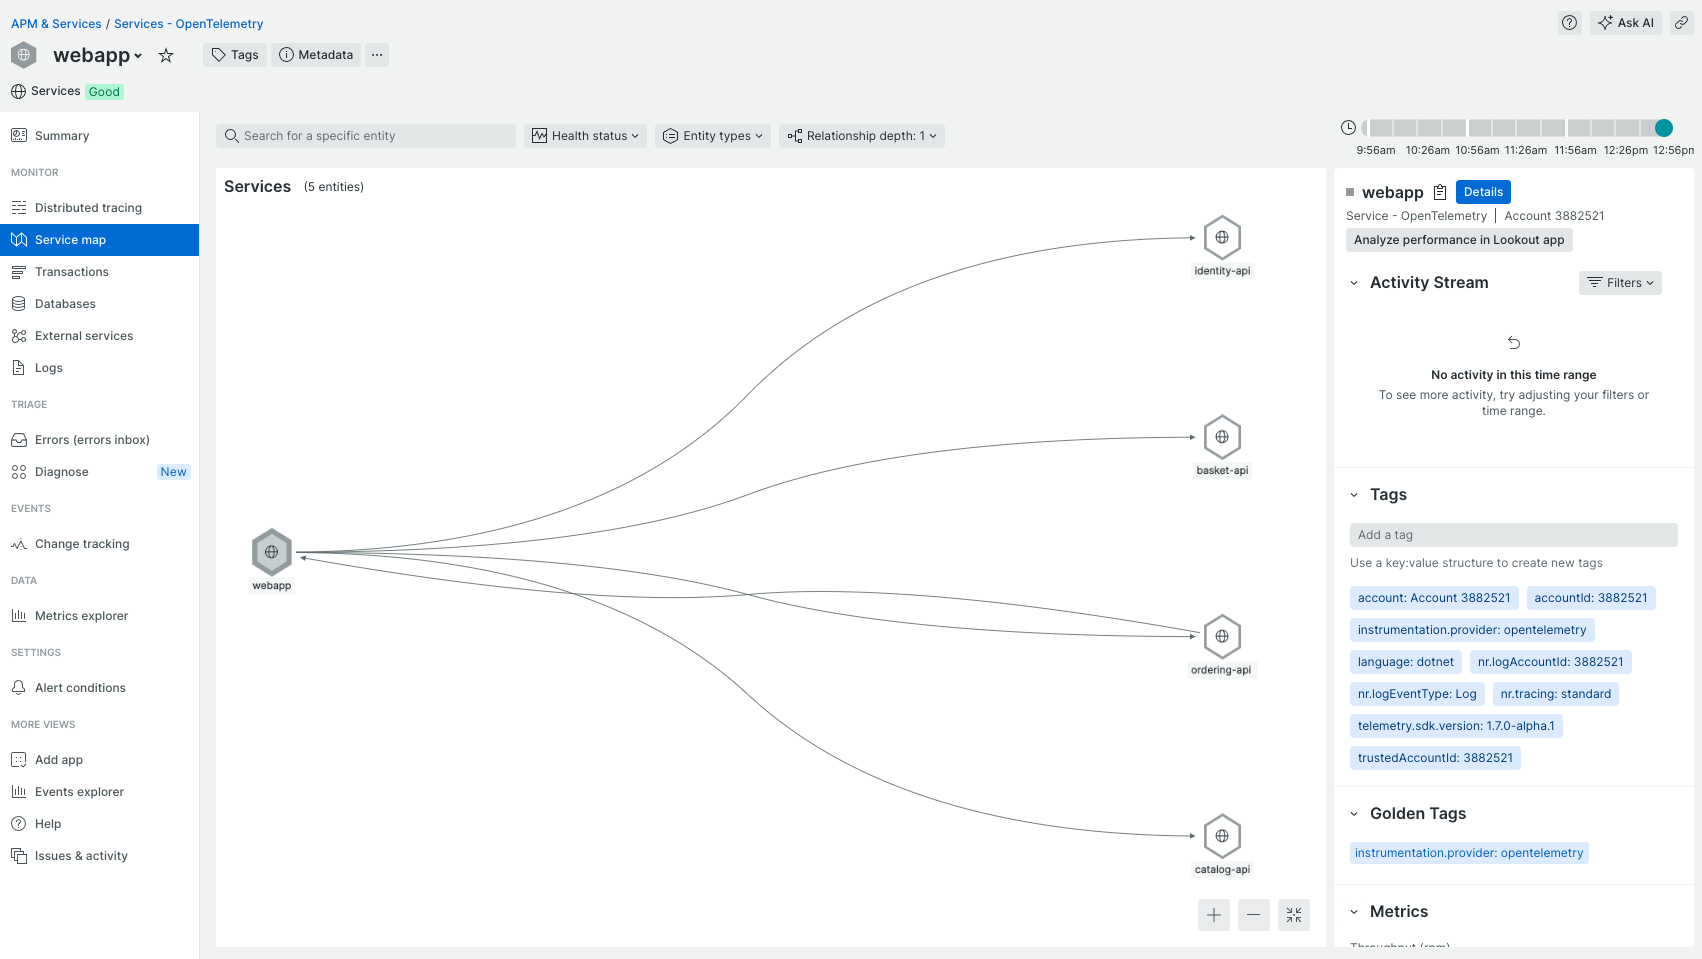
You can then observe and analyze all your telemetry. For example, look at the New Relic Services map:
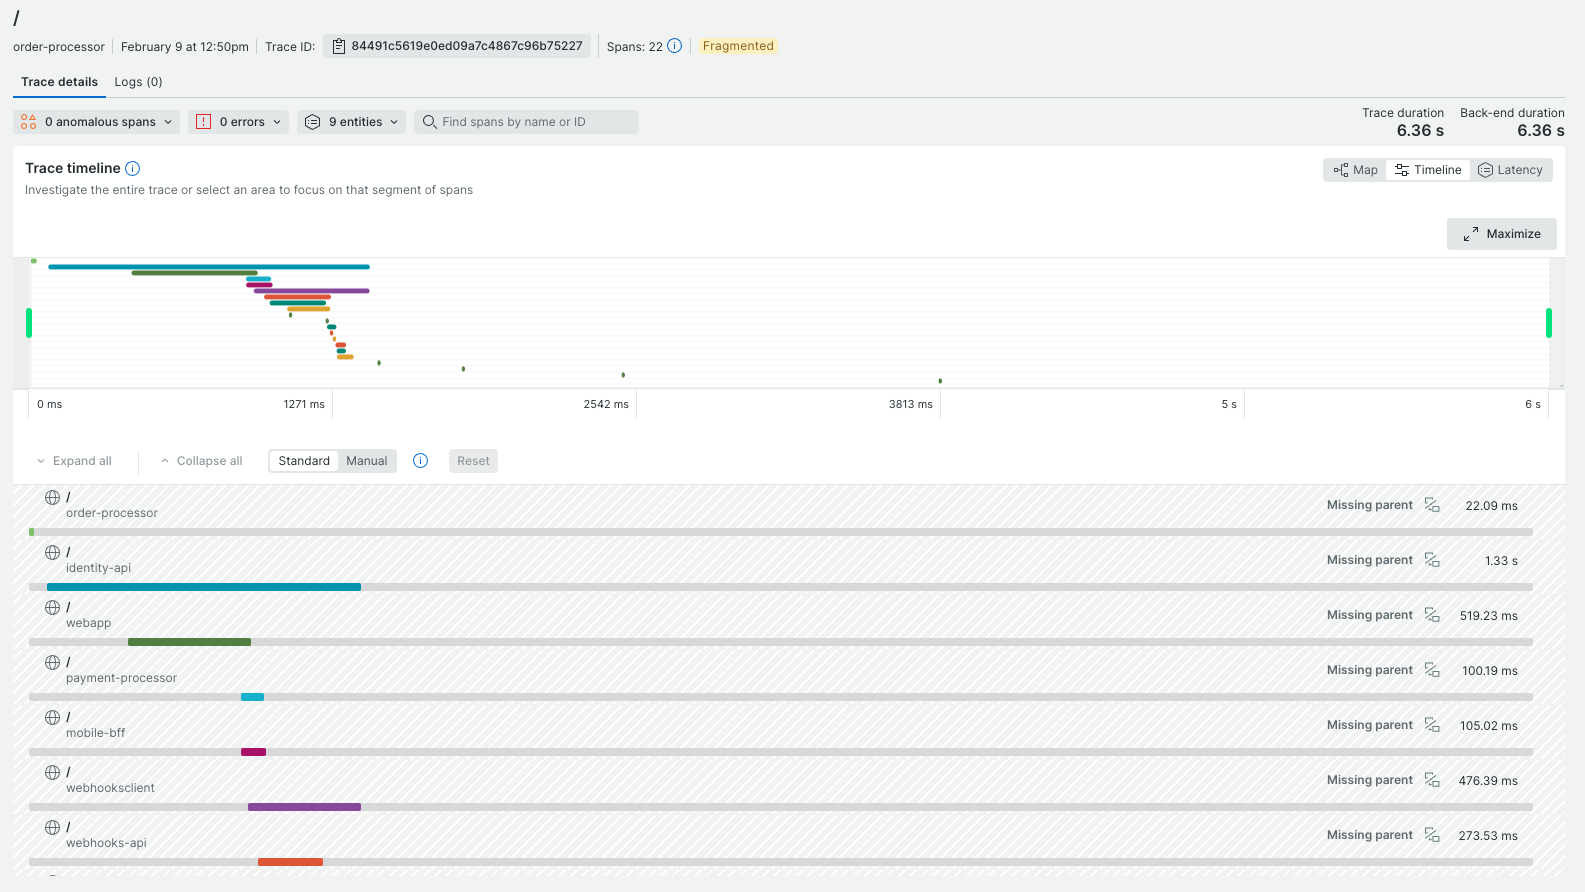
… or the distributed tracing view:
Happy observing!
Conclusion
Integrating OpenTelemetry with the .NET Aspire eShop application and New Relic allows you to leverage powerful telemetry tools to monitor and improve your application’s performance. This setup not only provides valuable insights but also enhances your ability to diagnose issues quickly and efficiently. With the steps outlined in this guide, you’re well on your way to building a more resilient and observant application. Start harnessing the full potential of your telemetry data today and keep your systems running smoothly!
Next steps
- Explore more: Dive deeper into New Relic’s OpenTelemetry documentation to unlock advanced features.
- Join the community: Engage with other developers on New Relic’s community forum.
- Stay updated: Follow our blog for the latest tips, tutorials, and industry news.
- Try New Relic for free: Sign up for a free New Relic account and start exploring how New Relic can enhance your application’s telemetry today.
- Experiment and iterate: Continuously monitor, analyze, and improve your telemetry setup for peak performance.